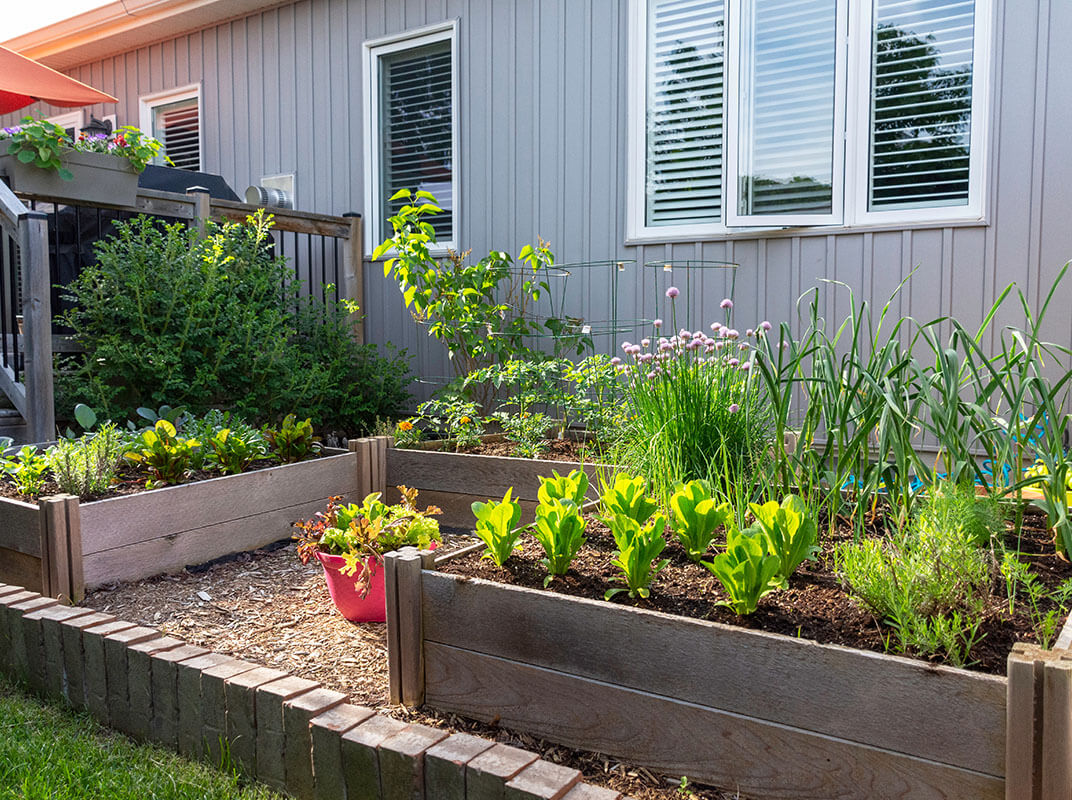
Building a garden box for your yard is easier than you might think. Fortunately, mostly mild Southern California weather allows many plants to grow year-round, and with the cooler days, it’s prime time for prepping your outdoor space.
Once you know what you want to grow, there are three straightforward steps to creating your own garden box.
Step 1: Measure the Outdoor Area
Before picking out any building materials, you’ll want to assess how much room you have to work with. Are you considering a single garden box along the side of the house? Or is a larger sectioned area of your yard more of what you have in mind?
Determine the height, width, and depth you’ll want based on what you want to grow. For example, tomato plants require greater depth than other vegetables. At J&W Lumber, we have pre-made garden box kits that are 12 inches in depth and are great for DIYers wanting to grow their own fruits and veggies.
However, if you are growing plants with longer roots, you’ll want a custom-cut garden box. Once you have the exact dimensions, stop by your local J&W Lumber store, and we can pre-cut the material to make sure the boards are even, especially at the corners, since stability is important.
Step 2: Secure Lumber and Materials
Typically, the easiest board size used for a DIY garden box is 2×12. Other sizes like 1×6 boards or 5/4 boards are also popular for building budget-friendly garden boxes.
Using redwood or cedar is the top recommendation for building garden boxes due to the durability and natural beauty of these woods. In addition, you’ll want to use exterior-coated screws. These are recommended over nails because once the wood absorbs water, the nails may eventually pop out.
Next, consider whether or not you’ll want to stain your garden box. If you are growing edible plants, avoid staining the inside of the box as chemicals may leach into the soil. Otherwise, you can choose from an array of wood stain colors to suit your chosen aesthetic.
Lastly, you’ll want to put down a metal mesh hardware cloth to keep ground critters out, and consider enclosing your garden with rolled wire to keep other birds and animals from reaching your plants.
Step 3: Customize by Shape and Style
Once you have the basics of your garden box ready, there are multiple ways to customize and add to it over time. Many homeowners like the look of lattice, particularly when they have limited space. Also, Wild Hog metal mesh panels can add height to the yard and make the space seem bigger with more depth.
There’s also the option of customizing the shape of your garden box. Position several garden boxes side by side and add a metal mesh top to keep the birds out. Another idea is adding tiered garden boxes by using railroad ties to create a retaining wall. This works well if you have a sloped yard to give life to an otherwise empty hill.
Whether you want to keep it simple with a DIY garden box kit or customize the dimensions for your dream garden, it can be as easy as 1-2-3. Let our friendly representative at J&W Lumber equip you with all the materials you’ll need to start building.
